
Credit: YWCA Metropolitan Chicago
You don’t have a Print Screen key on your keyboard? Don’t be worried. On a laptop, here’s how to take a screenshot.
Knowing how to take screenshots on a laptop is quite essential, and thankfully, both Windows and macOS laptops have this feature. While the built-in capabilities are sufficient, advanced users will discover that third-party screen capture and screencasting software is significantly superior.
Let’s look at how to capture a screenshot on a laptop running Windows 10 or macOS, either with the built-in tools or with the help of a more powerful third-party app. Also, you can see – how to reset an iPad
- Read your Guide – How to fix Ghost Touch on iPhone
- Read your Guide – How to Install Windows 11
- How to Fix Them – Windows 11 Common Installation Problems
How to Take a Screenshot on a Laptop
- How to Take a Screenshot on a Windows 10 Laptop
- How to Take a Screenshot on a MacBook or macOS
- This is how you can take Screen Shots from your laptop
How to Take a Screenshot on a Windows 10 Laptop
1. Using the Print Screen Key, take screenshots of your screen

Credit: How-To Geek
If you want to take a complete screenshot, use the Print Screen key on your laptop. It is also available if you have an additional keyboard connected to your laptop.
1. Press the Print Screen key on your laptop’s keyboard to take a screenshot. If you can’t find one that says “PS,” “PrntScrn,” or “PrtSc,” look for one that says “PS,” “PrntScrn,” or “PrtSc” if you can’t find one that says “Print Screen.”
2. A screenshot is saved to your clipboard when you press the Print Screen key. You may paste the screenshot into Paint or another image editing app and make changes as needed.
3. Press Windows key + Print Screen to save a screenshot as a file. The screen will dim for a second, indicating that your snapshot has been recorded and stored.
4. By default, all recorded screenshots are stored to the following location:
C:\Users\UserName\Pictures\Screenshots
Depending on the manufacturer of your laptop, you may need to experiment with different key combinations to save the screenshot as a file. For further information, consult the user manual for your laptop.
If your screen does not dim, make sure the Animate windows while minimizing and maximizing option in Advanced Options is turned on.

Credit: Cnet
Settings > System > About > Advanced system settings give you access to it. Select Settings from the Performance section of the Advanced tab.
The print screen feature will capture every active screen if you’re utilizing a dual-monitor configuration. To capture only the active window, press Alt + Print Screen while clicking on the title bar of the window you wish to record.
2. Using Windows 10’s Snipping Tool, take a screenshot
Is the Print Screen key on your keyboard not working? Don’t worry, you can still snap screenshots on Windows without using Print Screen. Snipping Tool is a built-in screenshot application in Microsoft Windows 7 and subsequent versions of the OS that allows you to capture custom regions or active windows. Here’s how to put it to good use.

Credit: Cnet
1. To start the snipping tool, put it into the Windows search box and click enter.
2. To take a new screenshot, click the New button. To pick the area you wish to capture, drag the crosshair.
3. You may use the pen tool to highlight text or draw on the screengrab.
4. Click the Mode button to see more lopping possibilities. To snap a specified region, choose Free-form, or use the Window option to capture active windows.
5. When taking screenshots, you may also set the shutter speed to one to five seconds.
3. Capture a Screenshot Using the Snip & Sketch Tool
You may utilize the new Snip & Sketch feature if you’re running Windows 10 October 2018 Update or later. It includes various handy new features as compared to the Snipping Tool.

Credit: Cnet
Snip & Sketch may be used to take screenshots:
1. Open the software by typing Snip and Sketch into the Windows search box.
2. Select New from the drop-down menu. For a brief period, your screen will darken, and a toolbar will appear on top. The Rectangular, Free-form, Window, and Full-Screen Snip choices are available.
3. Select Snip in 3 seconds or Snip in 10 seconds from the drop-down menu next to the New option for delayed snips.
4. A highlighter, a ball pen with different colors, a roller for straight lines, or a cropping tool to decrease the image may all be used to edit the screenshot. 5. If you make a mistake, use the eraser to correct it.
6. To save the image, use the Windows key + S.
You may also use the Snip & Sketch tool to take quick screenshots and save them automatically by pressing Windows key + Shift + S. All screenshots are saved in the Pictures folder under This PC.
4. Use the Built-In Windows 10 Game Bar
The Xbox Game Bar is now included in Windows 10. This bar gives PC gamers quick access to screen capture and sharing options. You can, however, use it to take standard screenshots on Windows 10 laptops.
To use the Game Bar feature to take screenshots:
1. To open the Game Bar app, press Windows + G on your keyboard.
2. Select the Camera icon from the menu. Game Bar will automatically take and store the screenshot. It will automatically grab the currently active window, so make sure you choose the proper one.

Credit: Cnet
The screenshot option in the Game Bar is rather rudimentary, but it serves its purpose effectively. It was created with gaming in mind, and it shows in its utility.
To adjust the keyboard shortcut and anything else, go to Start > Settings > Gaming > Xbox Game Bar.
5. Use ShareX to Take Professional Screenshots Using Advanced Features
The primitive screen capture tools in Windows 10 are capable of doing basic tasks admirably. If you want more complex capabilities, though, ShareX is the best free screenshot tool for Windows 10.

Credit: Cnet
Take screenshots, annotate them on the fly, record the screen, generate GIFs, and choose from a variety of capture methods using ShareX. We haven’t even mentioned the variety of post-capture options, such as annotations, blur, border customization, and so forth.
ShareX is an excellent utility if you need powerful screenshot software that does more than capture screenshots. It is feature-packed, and above all, free to use.
How to Take a Screenshot on a MacBook or macOS
On a MacBook, there are several ways to take a screenshot in MacOS. Finally, with the introduction of macOS Mojave, there is an integrated screenshot tool, similar to what we’ve seen with Windows OS.
1. Take Screenshot With the Screenshot Tool

Credit: Cnet
A built-in screenshot tool is included in MacOS Mojave and higher versions. To access it, go to Launchpad > Other > Screenshot or press Shift + Command + 5 on your keyboard. Here’s how to put it to good use.
1. To use the Screenshot tool, press Shift + Command + 5. A floating toolbar with a few options will appear.
2. You may take a screenshot of the whole screen, a custom region, an active window, and more.
3. You may use the delay option by going to Options and selecting it. It will provide you options such as where to save your Mac screenshots. The screenshots are saved to your desktop by default.

Credit: Cnet
This tool also has a screen recording feature. Pick Record full Screen or Selected Portion from the tool’s menu, then drag the crosshair to select the region. When you’re ready, press the Record button on your MacBook to begin screen recording.
2. Use the Shift + Command Shortcut to Take Screenshots on a Mac
To capture a complete screen, a custom region, or an open window, MacOS has pre-defined shortcuts. It’s great for quickly taking screenshots without having to utilize the Screenshot tool.
On a MacBook, use shortcuts to take screenshots.:
1. To capture the full screen, use Shift + Command + 3 on your keyboard. A thumbnail will appear in the corner of your screen. You may either alter the screenshot or save it to your desktop.
2. To grab a section of the screen, use Shift + Command + 4. Select the region to be captured by dragging the crosshair.
3. Press Shift + Command + 4 + Space bar instead. A camera icon will appear on the screen. After selecting the window you wish to capture, click the camera icon.
Use the Control and Shift keys together to copy screenshots to your clipboard. To capture a custom region, for example, use Shift + Command + Control + 4, then take a screenshot, which will be saved to your clipboard.
3. Use Snagit Screen Capture and Recording for Mac
Techsmith, the makers of Camtasia Studio, have released Snagit, a sophisticated screen capture and recording tool. It’s a paid tool that allows you to instantly capture your screen and add context with notes, text, and more.
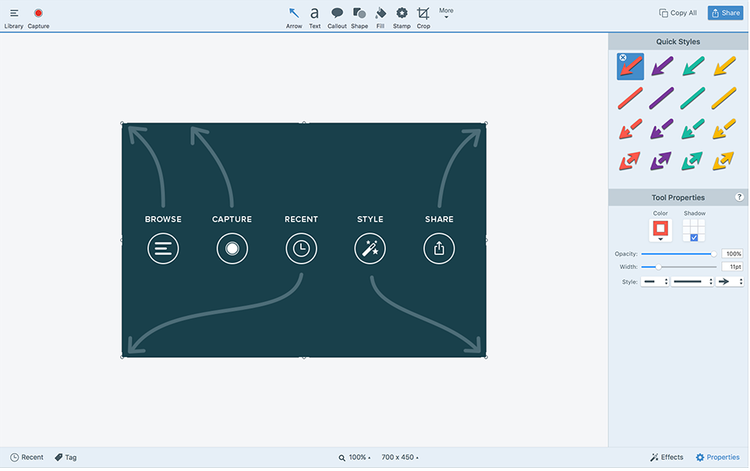
Credit: Cnet
Snagit supports a variety of screenshot and screen recording capture methods. You may also add text, notes, and templates to videos for visual tutorials.
Unfortunately, Snagit is not available for free. If you don’t want to spend money on a screen capture application right now, Snappy, LightShot, and Skitch are all fantastic free options for Mac.
This is how you can take Screen Shots from your laptop
Screenshots are useful for sharing an error screen with tech help, announcing a new discovery on social media, or even commemorating a milestone with friends and family. Regardless of whether you prefer Windows or macOS, you now have access to the best screenshotting tools available.
If you don’t want to install apps for everything, internet screenshot tools are a good option that is growing better all the time.


